Magic at Midnight Cake

I put a spell on you.
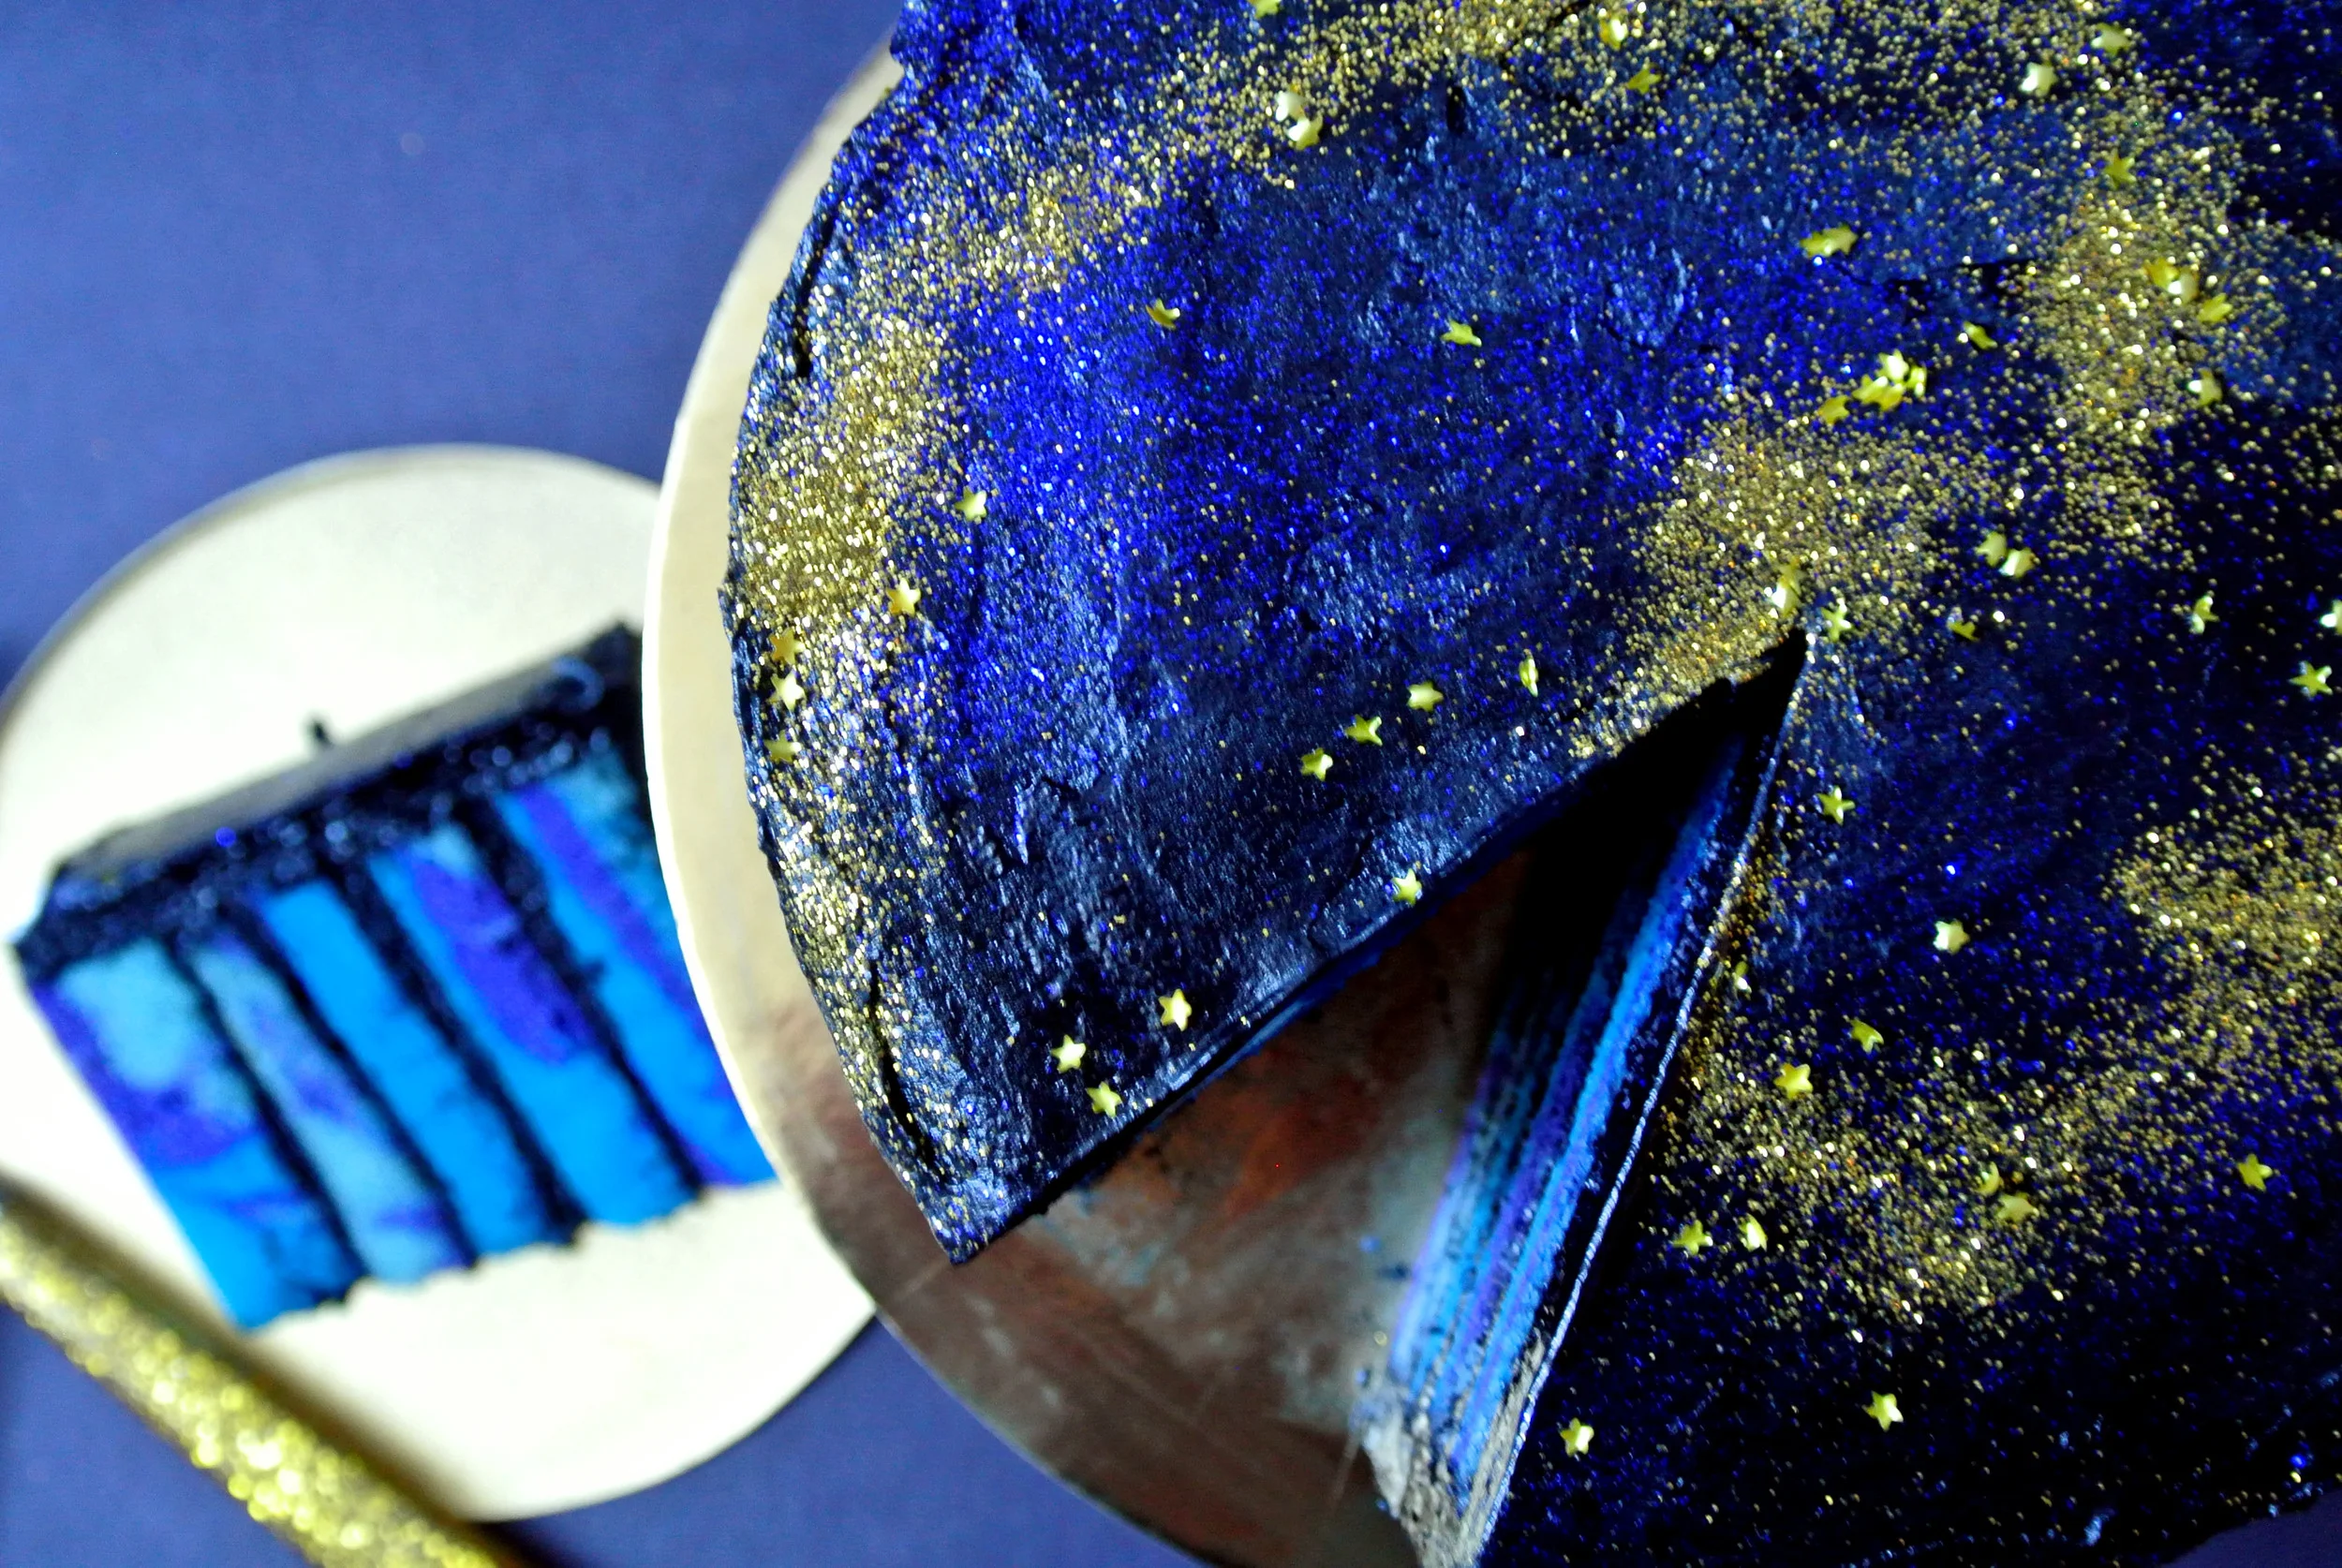
And now your mouth is black. Seriously, the frosting on this cake will turn your mouth a morbid shade of noir but, hey, WORTH IT.
There's something a little magical that comes with the stroke of midnight, isn't there? If not there wouldn't be all these fairy tales about the clock striking twelve. When the stars are out and the night is late anything could happen. I wanted to capture a little of that magic in edible form. What better canvas than a cake?
Accio Cake! (A little Harry Potter humor for the nerds out there)
I've got to be honest; this week has been one of those weeks where nothing seems to be going quite right. You know the kind? You go to clean your kitchen and end up spilling flour all over your freshly cleaned counters or you try to go for a run and end up making yourself sick 2 miles from home or you simply just can't get out of a funk. If only real magic could help!
Now, it's the Halloween season (all of October counts people) and I wanted to find a way to introduce a little hocus pocus into my melancholy mood. While I am not one for horror, gore, or spooks, a little witchy magic gets me in the festive Halloween spirit. There's something less scary about spells and potions, maybe due to all the Harry Potter I read growing up but it's certainly fun to bake with magic in mind. Magic in the daytime just seemed weird so I drew my inspiration from the true "witching" hour.
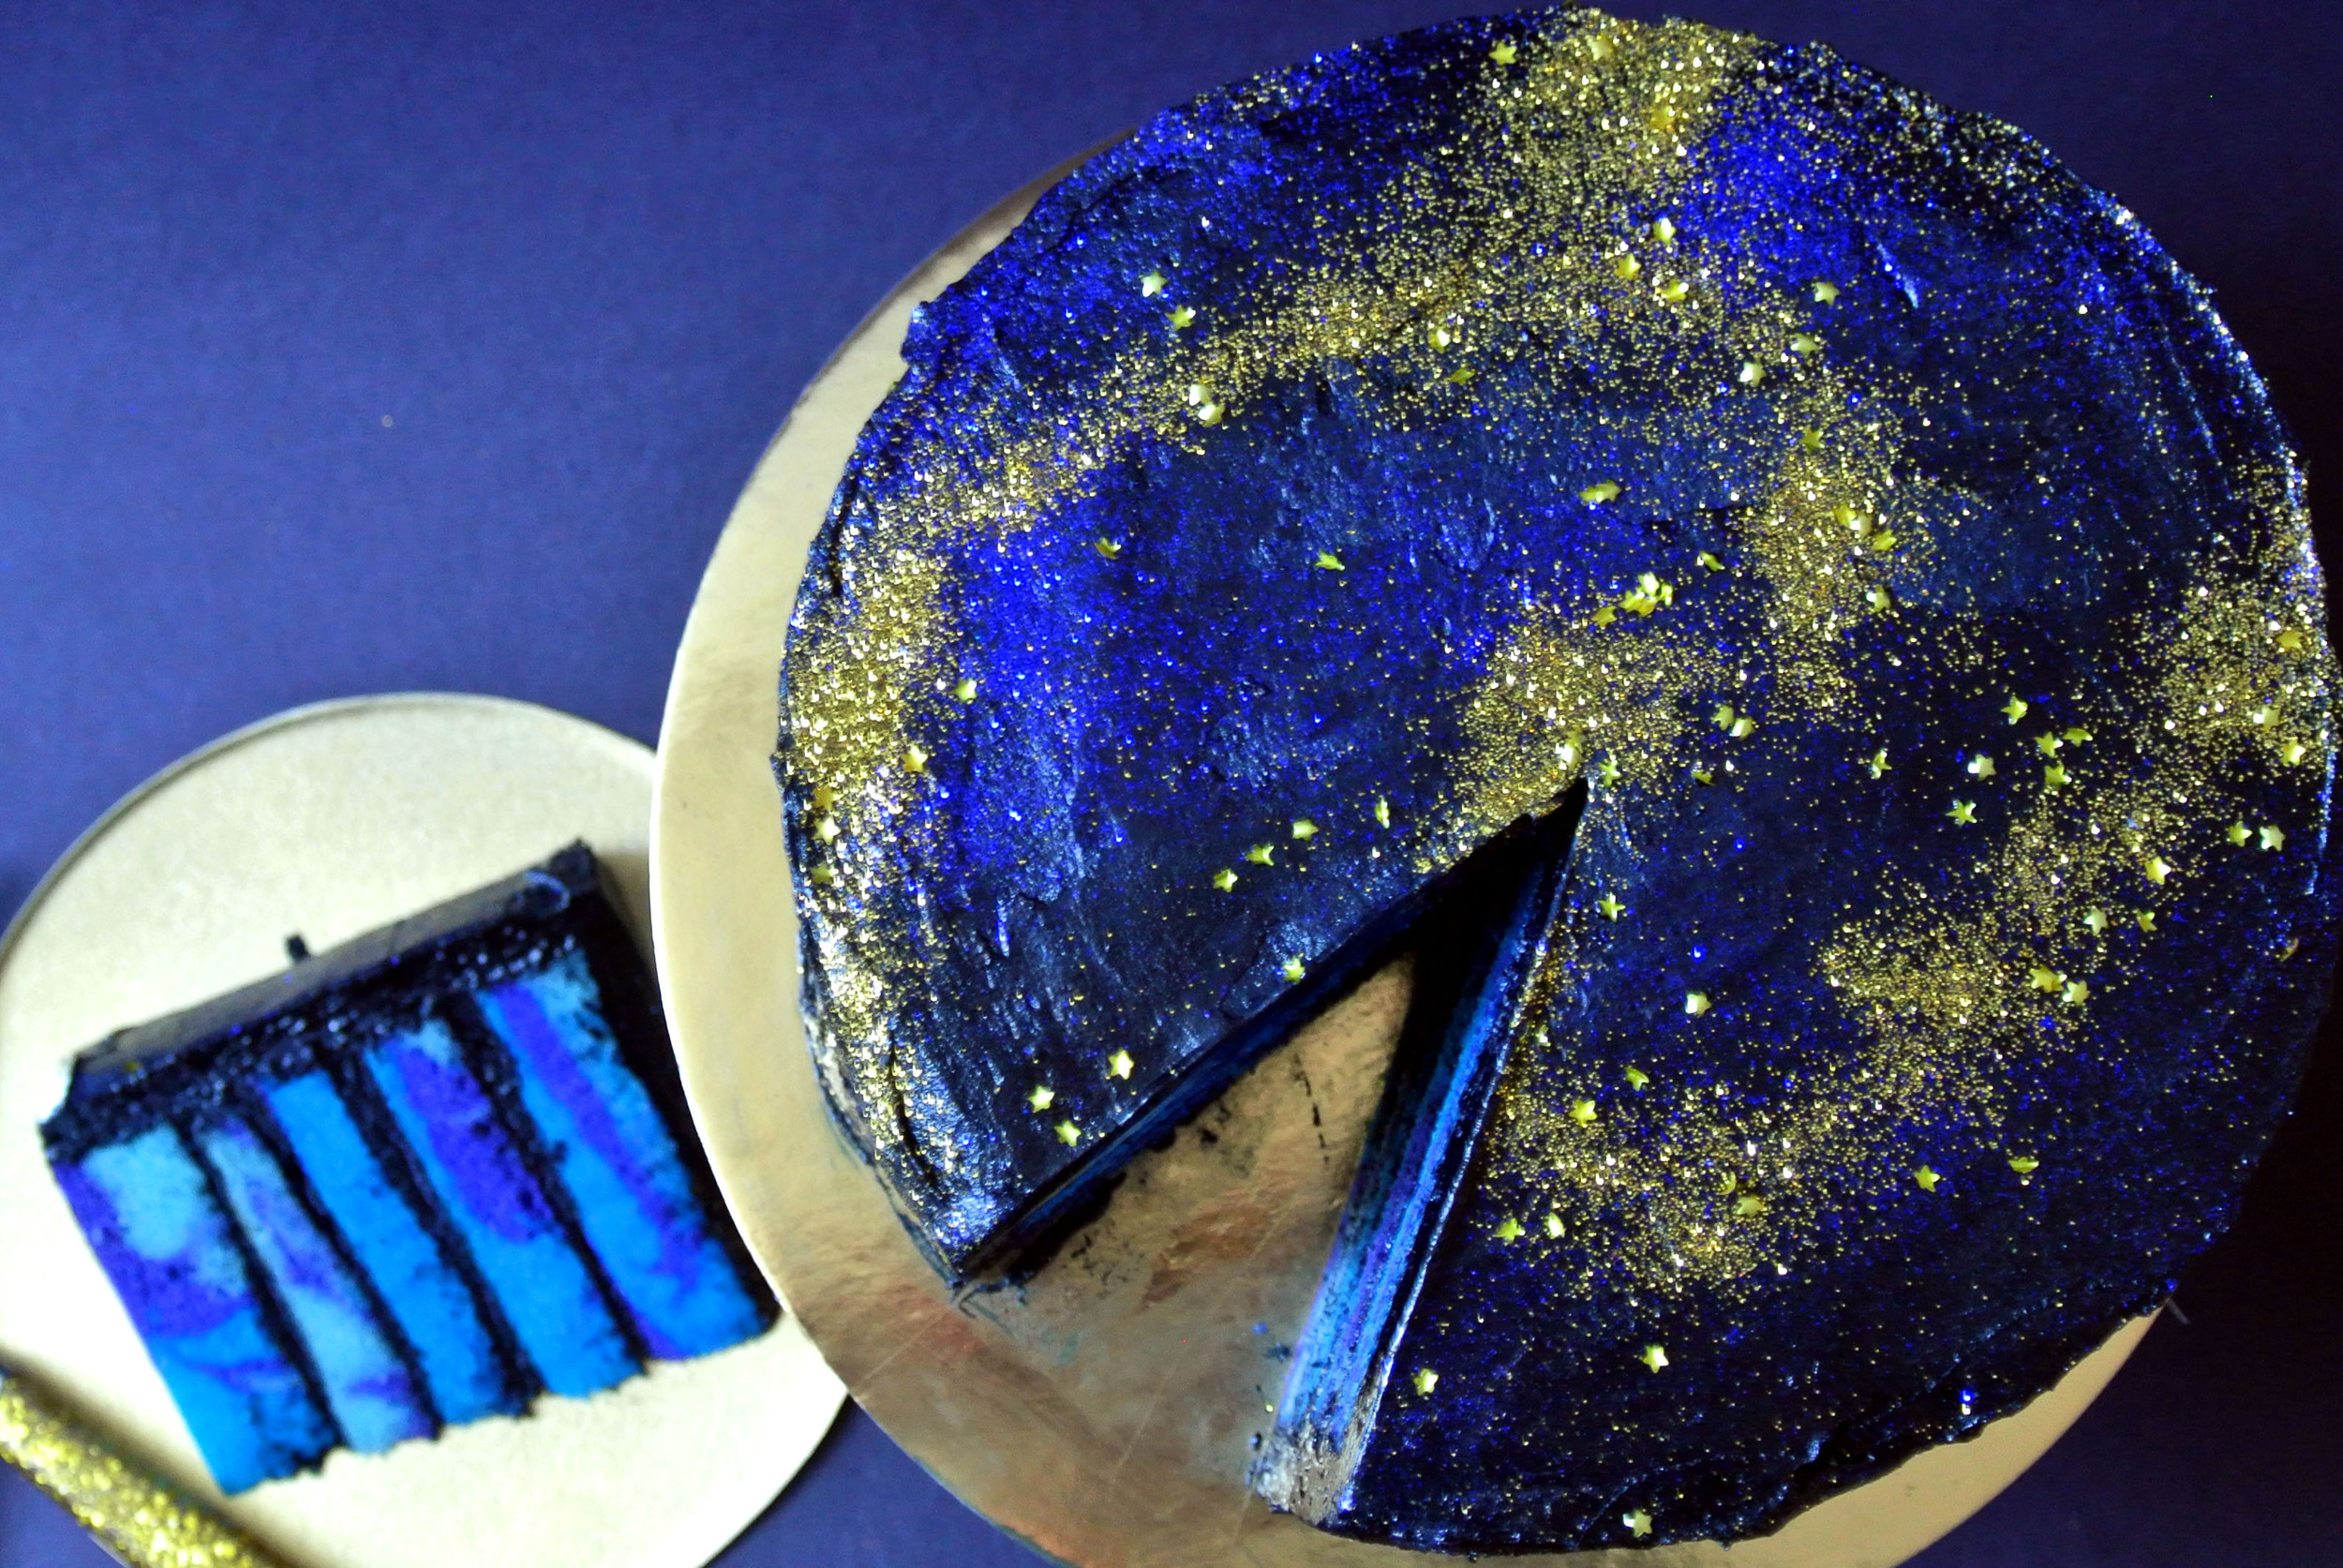
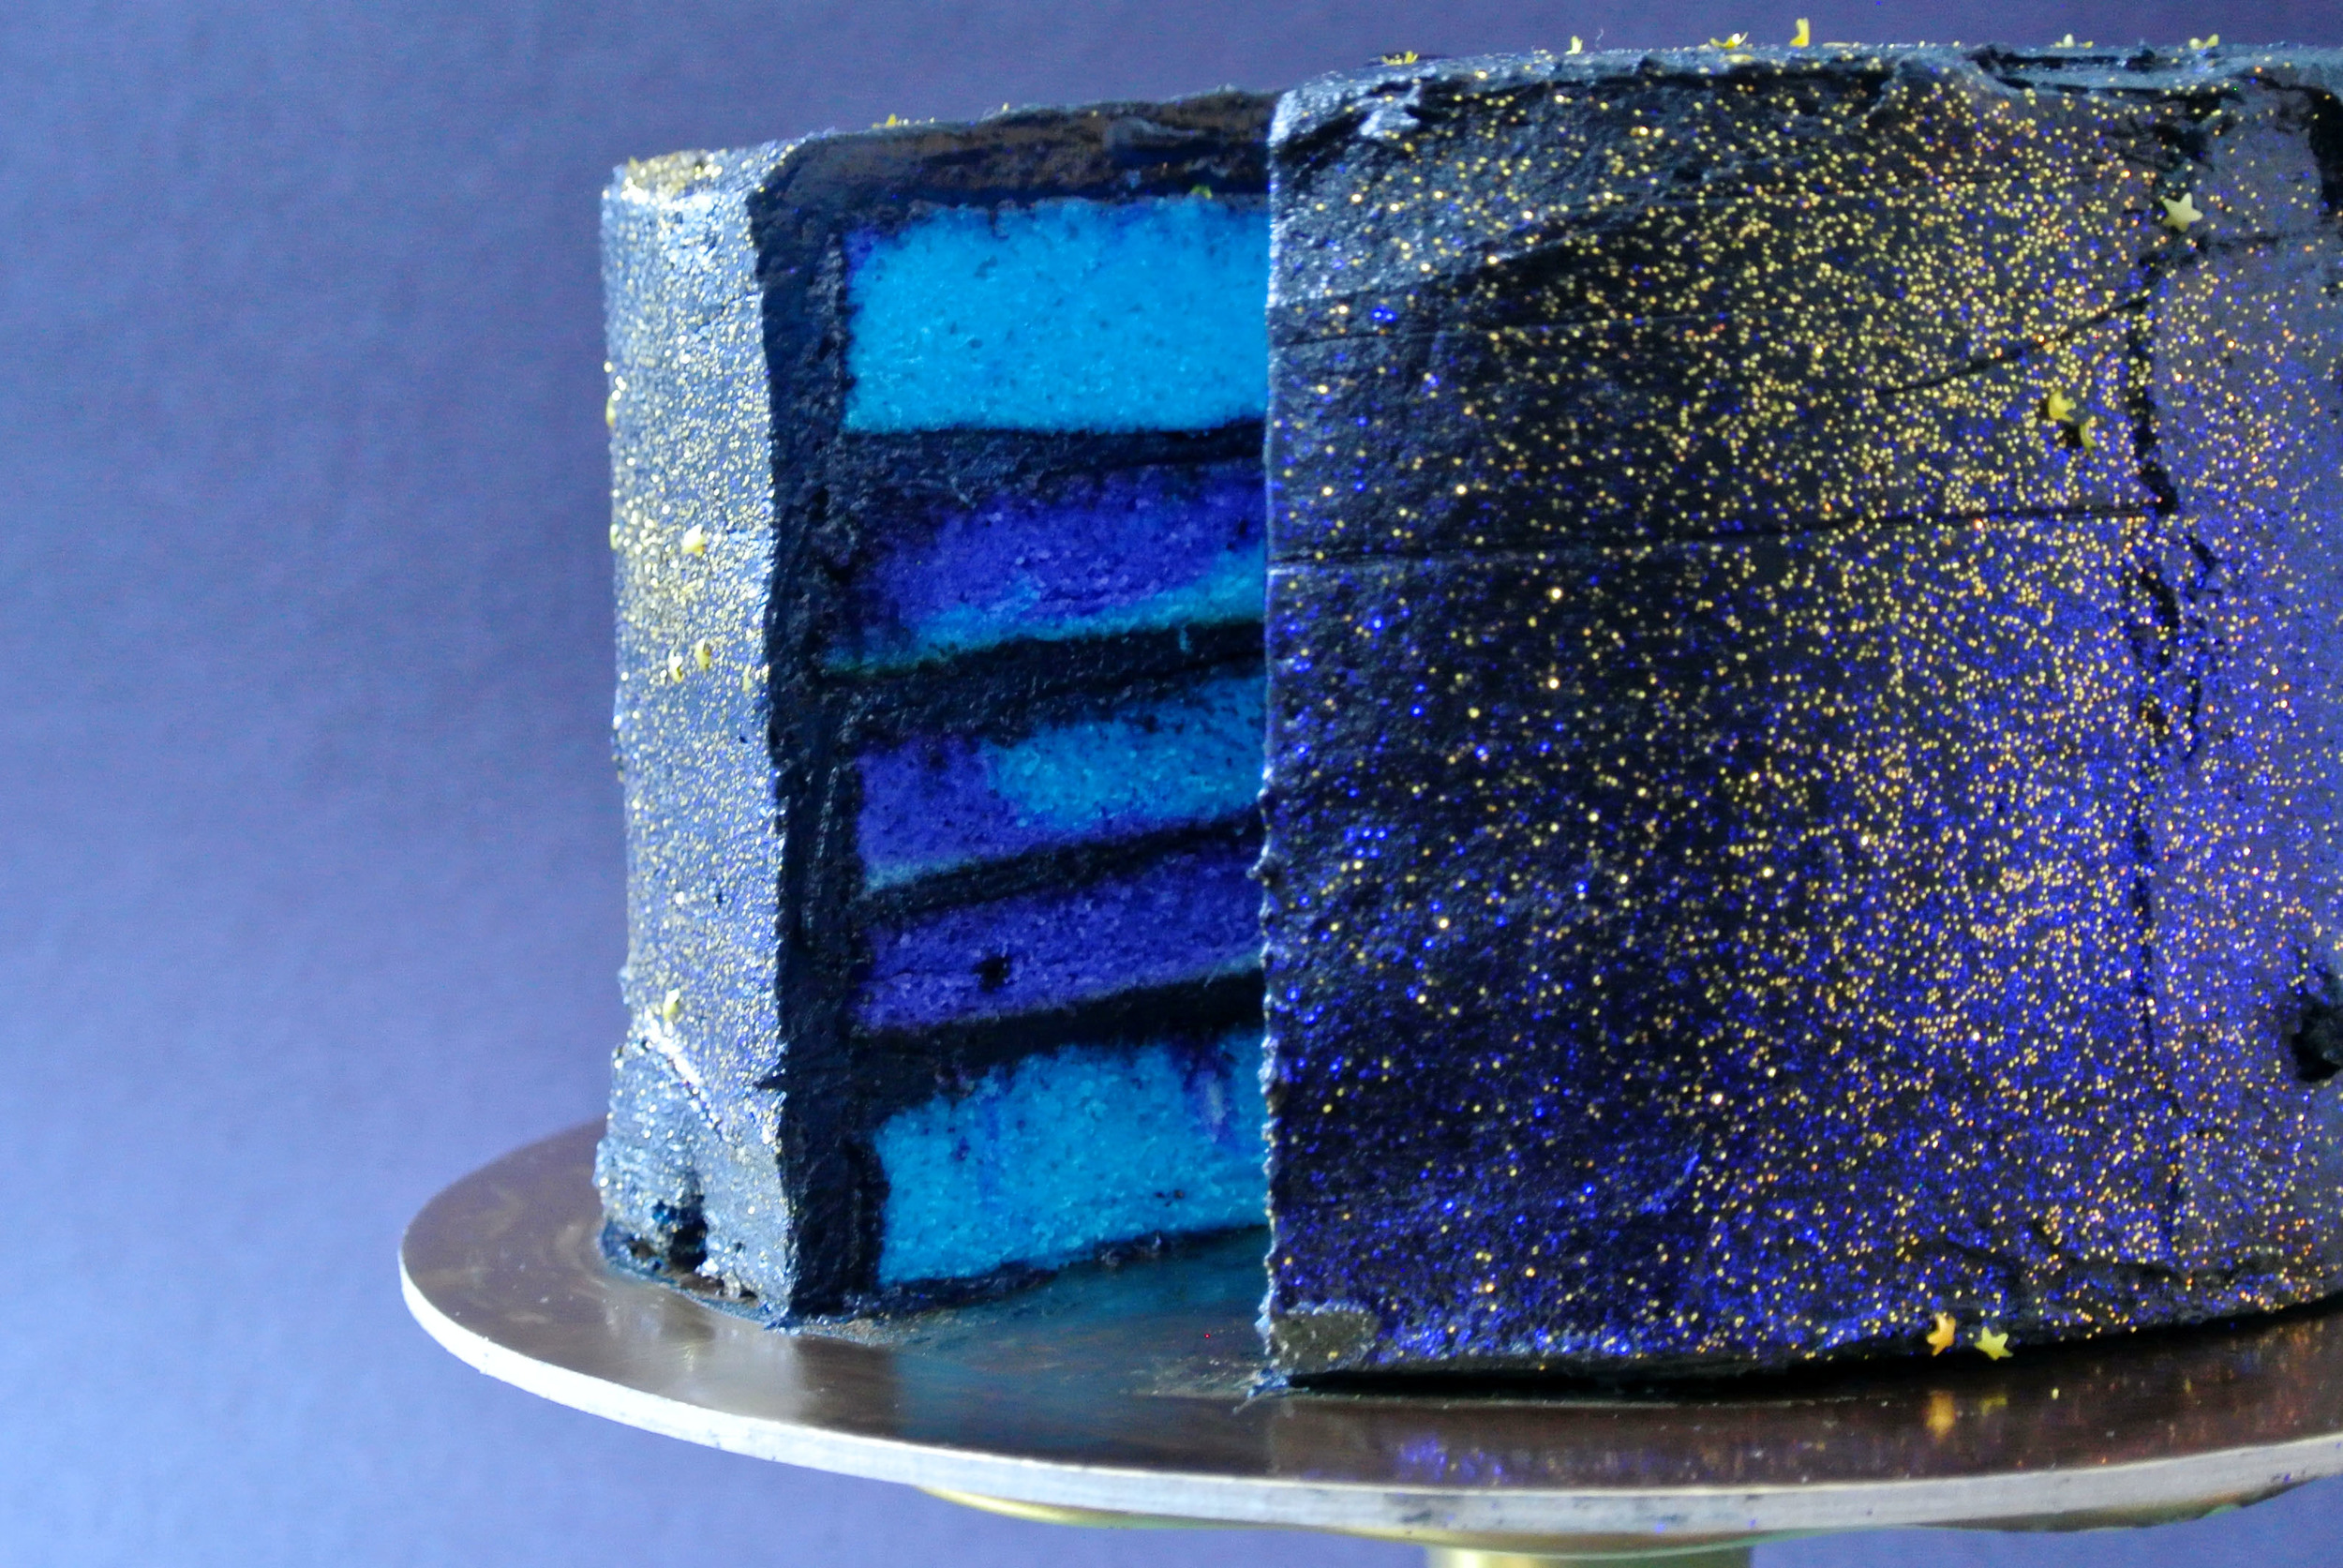
After reaching out to several friends and family about what they thought a midnight cake might taste like I decided everyone had vastly different opinions. What mattered most? Just that it tasted delicious. For the surprise swirly insides I went with vanilla cake dyed shades of blue and purple. Making the swirled cake layers actually turned out a lot easier than I would've thought (see instructions below). And for the midnight colored frosting I knew I had to start with a dark base... what's more out of this world that chocolate-hazelnut?! Nutella anyone?!? So freakin' good. It would be easy to adapt this buttercream to any flavor you like as long as you have a dark chocolate base. Orange Extract? Delicious. Peppermint? If that's your cup of tea. Anise? You name it!
Preheat your oven and whip up a little magic yourself!
Vanilla Swirl Cake
(recipe for 1 1/2 sheet cake or 3 6" round cake pans)
- 3 1/2 cups cake flour
- 4 tsp baking powder
- 1/2 tsp salt
- 6 large egg whites
- 1 1/2 cups buttermilk
- 1 cup vegetable oil
- 1 1/2 cups sugar
- 2 tsp clear vanilla extract (birthday cake flavoring)
- Americolor Gel Paste: sky blue food color
- Americolor Gel Paste: violet
- Americolor Gel Paste: black
Preheat oven to 350 degrees.
Grease one 1/2 size baking sheet or three 6" cake pans (or two 9" cake pans) and line with silicone mat or parchment paper. Set aside.
Sift together flour, baking powder, and salt in a medium sized bowl. In a separate large bowl, whisk together egg whites, buttermilk, oil, sugar and vanilla. Gradually add dry ingredients to wet ingredients in three additions, beating until smooth and scraping down the sides as needed.
Divide batter evenly into three bowls. Tint one bowl with violet food color and mix until a consistent shade is achieved. Start with a small amount of food coloring gel and gradually add more if needed. In the second bowl add a tiny amount of sky food color and mix until a light turquoise color is reached. In the last bowl, tint the batter with sky blue and a small drop of black food color; mix until well combined. Place large spoon-fulls of each color batter in the pans, alternating them often so that the colors are well varied. Use a toothpick to swirl and marble the batter.
Bake the cake 350 for 25 to 30 minutes, or until a toothpick tester inserted in the center comes out clean. Let cool slightly in pan, then turn out to cool completely. I used a 6 inch cake ring to cut my sheet cake into 4 solid layers and two halves to create the base layer. This technique was easier for me since I did not have 6" cake pans but is not necessary to create this cake. It's typically used for "naked" cakes like this one. Assembly instructions for the cake ring technique can be seen here.
Midnight Frosting
- 2 sticks (1 cup) unsalted butter
- 3 cups confectioners sugar
- 1/4 cup cocoa powder
- 1 tablespoon heavy whipping cream (+ more depending on texture)
- 1 teaspoon hazelnut extract
- 2 teaspoon americolor gel food coloring in black
- 2 teaspoon americolor gel food coloring in navy
- disco dust: gold and midnight blue (these are worth the cost; they last forever)
- Wilton edible gold stars
In a large bowl beat butter until fluffy. Gradually add in confectioners sugar on a low speed until combined. Sift in cocoa powder. Frosting will be thick. Add in 1 tablespoon of whipping cream and hazelnut extract. If frosting is still too thick add in one teaspoon at a time of heavy whipping cream. Keep in mind that the gel food coloring will add some moisture. Finally add in both the navy and black food coloring until desired color is achieved.
Fill each cake layer with about 1/4 cup of frosting and then crumb coat the outside of the cake. A crumb coat is just a really thin layer of frosting that seals in all the crumbs. Stick the cake in the refrigerator for half an hour to harden up a bit and then use the remaining frosting to cover the outside of your cake. Putting a teeny-tiny amount of edible midnight blue glitter in the cap of the container gently blow edible glitter dust over the surface of the cake. It's very very fine disco dust so it will easily coat the entire frosted cake with just a pinch of glitter. Next use the cap of the gold disco dust to gently tap gold glitter into a swirling pattern on the top and side of the cake. Its kind of like tapping a ground pepper container into your gravy so you don't add too much at once. Be patient! The end result of gold swirls will be worth it. Finally sprinkle edible gold stars along your gold glitter swirls for the "midnight" or milky-way effect.
And Voila! Magic is complete!
P.S. Any photographers out there looking to photograph food for their portfolio? I'd love to collaborate and share some delicious baked goods. Contact me at whippedupwhimsy@gmail.com!